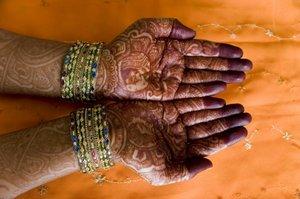
Indian tattoos, once reserved for brides going through a henna ritual, are now sought after by celebrities and civilians alike. If you think you might like to have a tattoo, but you're not enthusiastic about pain or permanency then you're going to love this body art.
About Indian Tattoos
Indian tattoos are incredibly different from nearly any other tattoo style you'll find the world over.
For starters, these tats are created by staining the skin with a pigment paste made from the leaves of the henna plant. The tattoos are painted on the skin, so the process is virtually painless as opposed to other tattoo styles that push or inject various inks beneath the skin with a variety of tools.
Since the skin is only stained, these tattoos are temporary rather than permanent, and usually break down and fade away within a few weeks. There's a great advantage to this aspect of Indian body art. Once the design fades out, another one can be inked in its place. There's never a chance of becoming bored with your tat or being stuck with an outdated design.
Henna tattoos are also mainly monochromatic, meaning only a single color is used throughout the design. Usually this is a shade of brownish red, but the henna can be mixed with other plant materials to alter it's natural coloring.
Mehndi
Mehndi, or Mehendi as it is sometimes called, is the quintessential henna tattoo. Tiny dots, teardrops, circles and arcing lines are strung together to create intricate, lacy patterns. Indian tattoos of this design show incredible depth and artistry, and take many painstaking hours to create.
Arabic
Arabic-style Indian tattoos still create quite a tapestry, but they differ from Mehndi because they use larger floral motifs.
Bridal Tattoos
The traditional Indian bride isn't fully dressed for the wedding until her hands and feet have been covered in Mehndi.
The practice is very spiritual and steeped in superstition. The designs are believed to bring good luck to the bridal couple, and especially to the bride herself. It's believed that the darker the pigment, the more the new mother-in-law will love the bride.
These tattoos are also thought to:
- Increase fertility
- Guarantee good health
- Impart wisdom/enlightenment
- Act as a talisman against harm
The pottu is another traditional body art design worn by Indian women to show their marital status. This red dot worn on the forehead between the eye brows is usually created using vermillion dye.
Popular Indian Tats

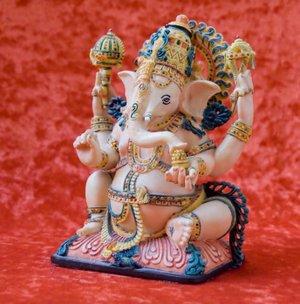
We've covered traditional Indian tattoos, now let's talk about Indian-Style tattoos. Tats created using imagery from the culture of India are some of the most colorful and fanciful designs you'll ever see. Rather than henna, these tats are usually created using a tattoo machine and standard inks. Popular designs include:
- Kali: The god who is the source of life
- Shiva: The god of reproduction/destruction
- Krishna: Member of the Hindu trinity
- Lakshmi stars
- Mandalas
- Asian elephants
- Peacocks
Do-It-Yourself Henna Tattoos
If you have a steady hand and a bit of artistic talent, you can create your own henna tattoos. Just be sure to test yourself for an allergic reaction to the paste by putting a small dot of it on an inconspicuous part of your skin. If there is no redness or irritation after three hours, you can go ahead and apply your temporary tattoo.
Henna Paste Recipe
In a glass bowl combine:
- 2 teaspoons sifted powdered henna
- 2 teaspoons brewed black tea
- 10 drops of henna oil
- 4 drops tea tree oil
Once all ingredients are combined, stir thoroughly in a counter-clockwise direction until all lumps have been removed. Cover the bowl with a paper towel, and set aside to ferment at room temperature for the next eight to twelve hours. The longer you let it cure, the darker the pigment will be and the longer it will last in your skin.
The henna paste should have the consistency of loose toothpaste so it will pass easily through a cake decorating tip, yet still hold its form when applied to the skin in dots and lines. If it's too loose, add a pinch more henna powder at a time until the paste is the right consistency. If too thick, add one drop of henna oil at a time and mix until the paste is slightly thinned.
Henna paste stored at room temperature will keep for about three days. If you need more after that, mix a fresh batch.
Application

Henna paste can be applied to your skin using a toothpick, or a fine round cake decorating tip and a cut down disposable icing bag. Learning to use a cake tip takes a bit of practice (which can be done on some plastic wrap), but once you get the hang of it you'll have better control over your design.
Create your own designs using a series of dots, arcing lines or whatever else pleases you. As you work, it will be necessary to re-moisten the paste on your skin every twenty minutes to give it more time for the pigment to soak in. Use a mixture of one part sugar to three parts lemon juice and gently dab it over the paste with a cotton swab.
Allow the henna paste to remain on your skin as long as you possible can, at least for four hours. Then, soak it with olive oil and gently scrape away the dried paste with a credit card or other edged material. Lightly rub the excess olive oil into the skin to help protect and preserve your ink.


